Step 1: Access your Zoho Books Account
- Sign in to your Zoho Books Online Account.
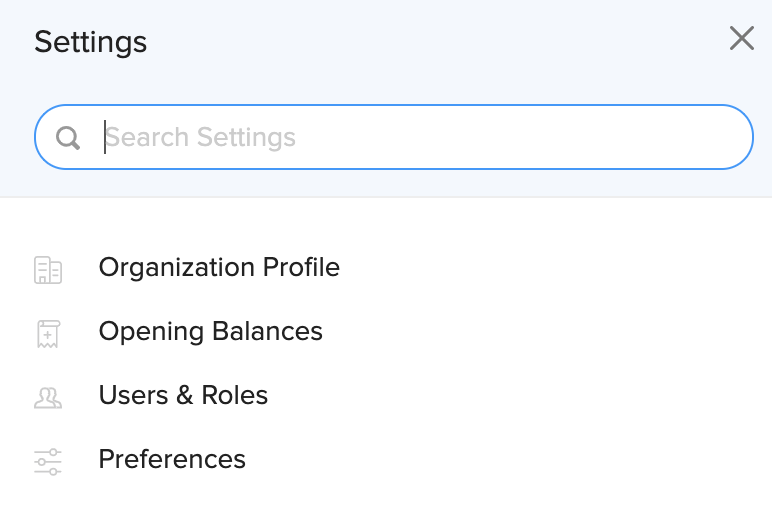
- Click on the gear icon in the top right corner.
- Click Users & Roles under the Settings menu.
Step 2: Create Custom Role
- Select the Roles tab on the top of the page.
- Click the red New Role button in the top right corner of the page.
- View Only
Type this into the Role Name field.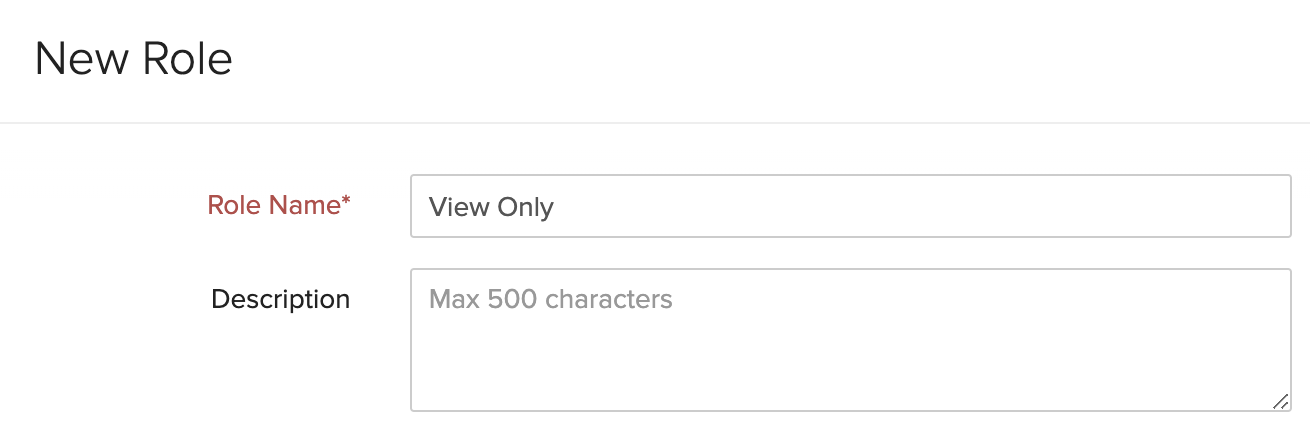
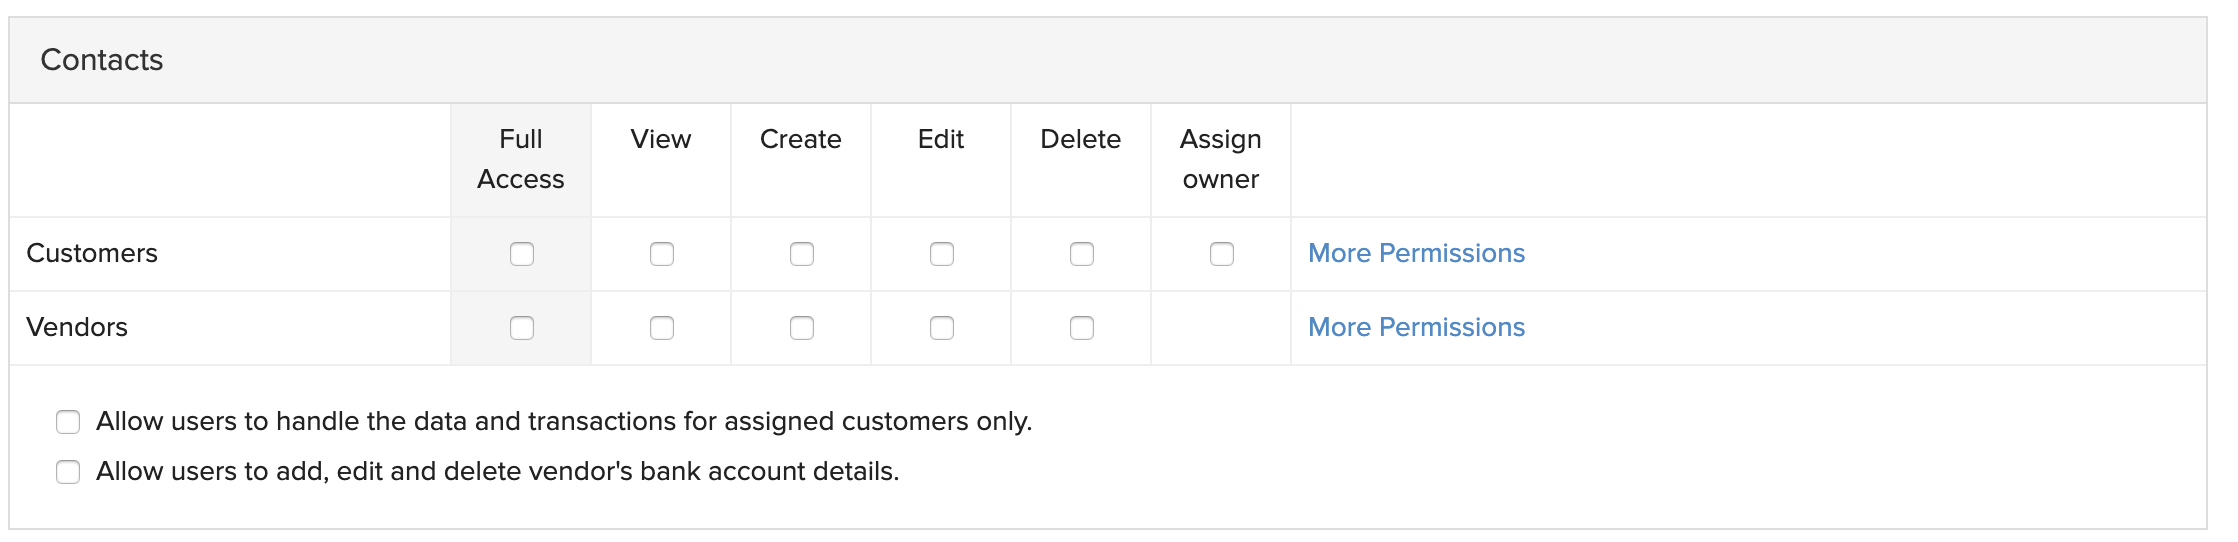
- Under Contacts, uncheck Full Access for all the boxes.
- Under Items, uncheck Full Access and check View for all the boxes.

- Under Banking, uncheck Full Access and check View.

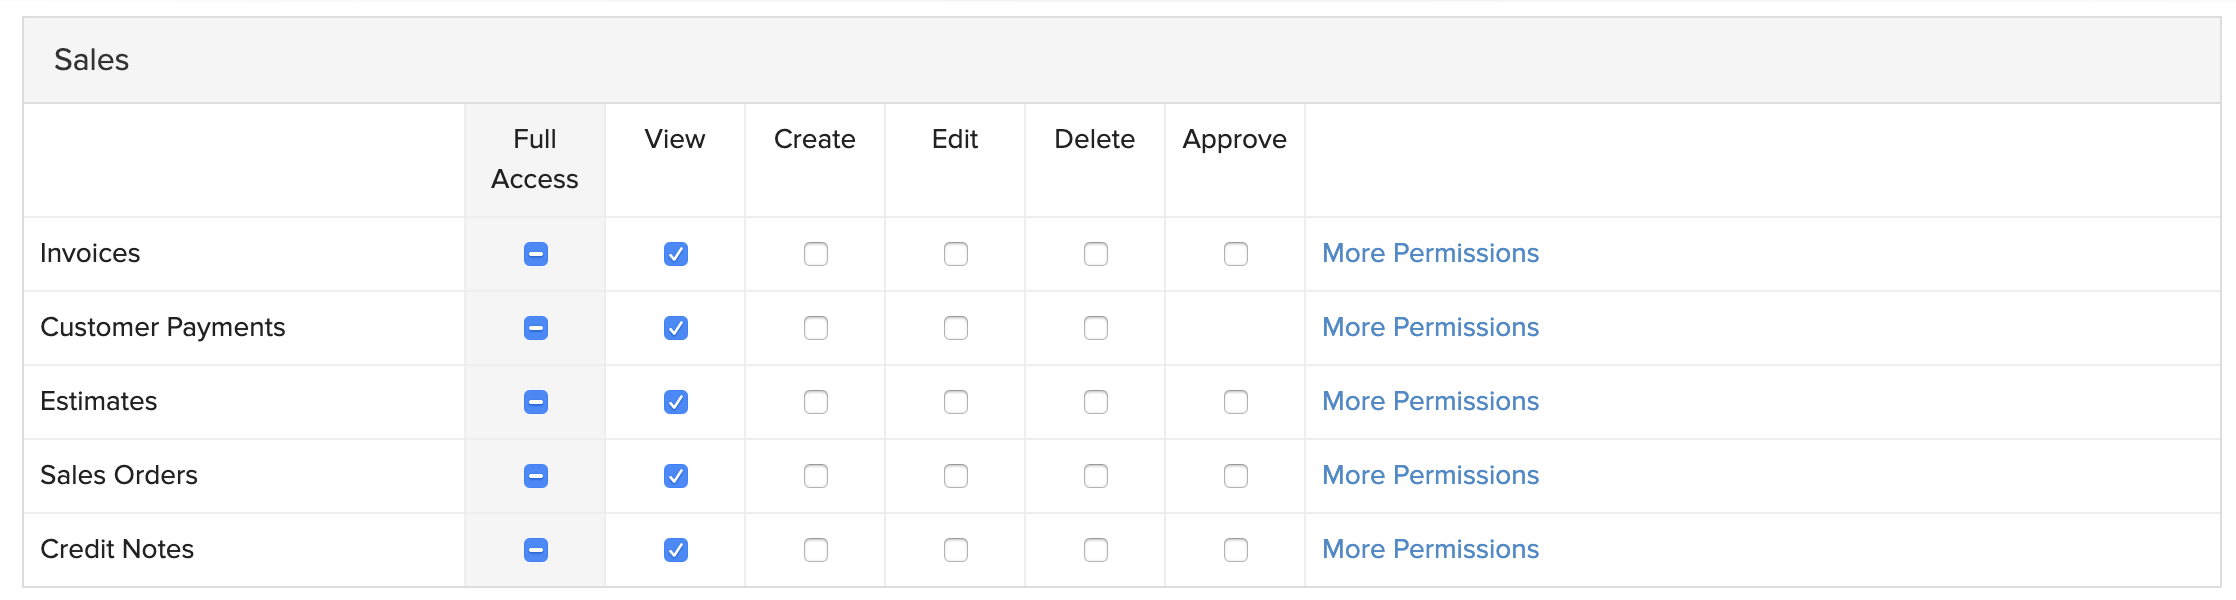
- Under Sales, uncheck Full Access for all the boxes and check View for all the boxes.
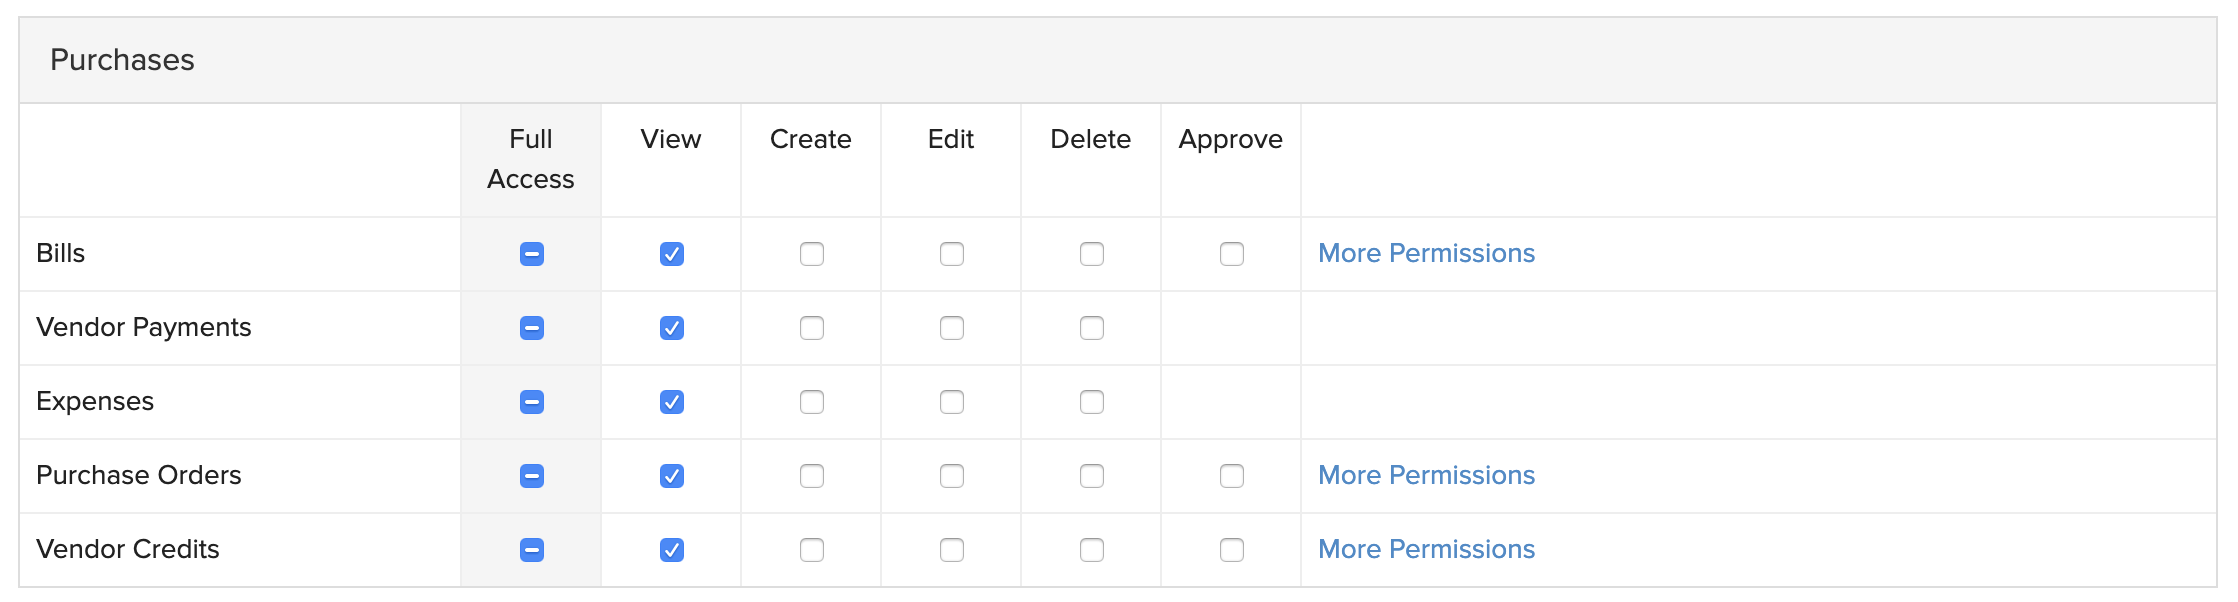
- Under Purchases, uncheck Full Access for all the boxes and check View for all the boxes.
- Under Accountant, uncheck Full Access for all the boxes and check View for all the boxes.

- Under Budgets, uncheck Full Access and check View.

- Under Timesheets, uncheck Full Access.

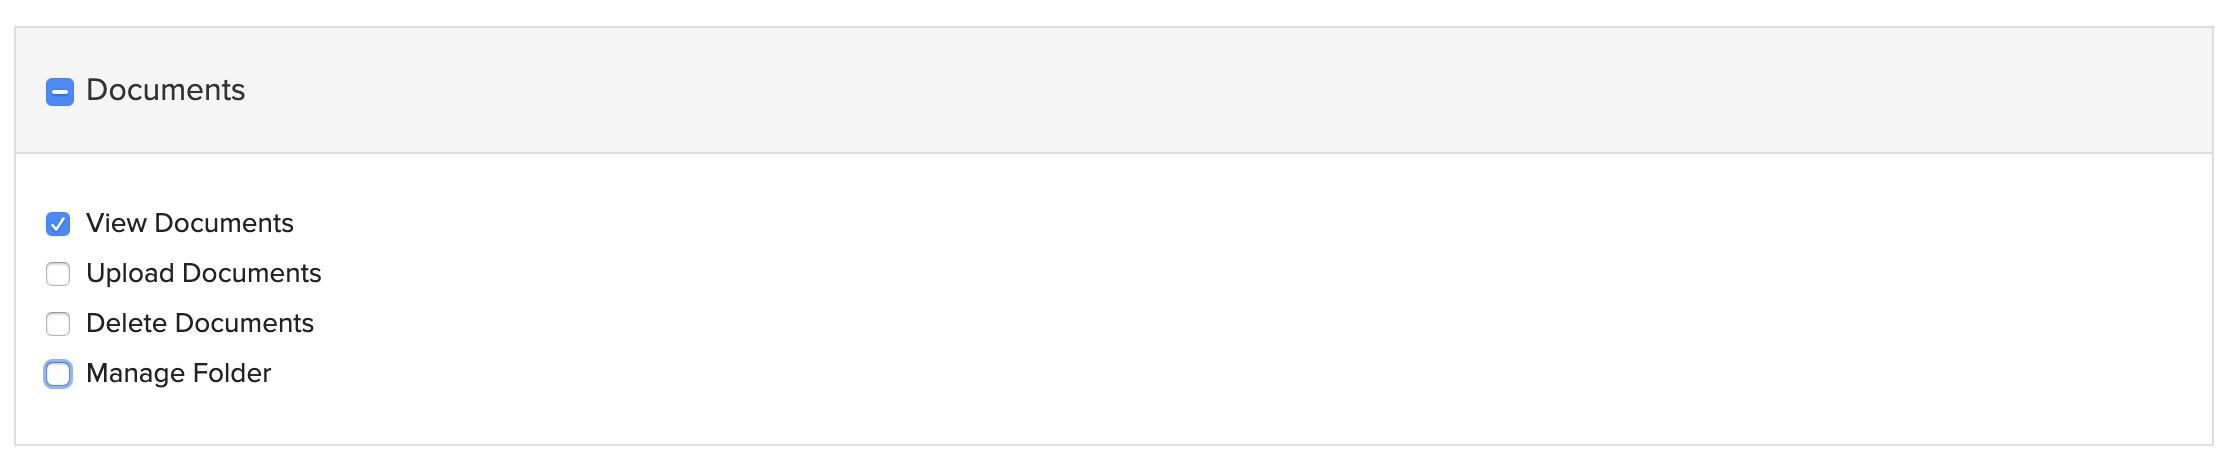
- Under Documents, leave only View Documents checked.
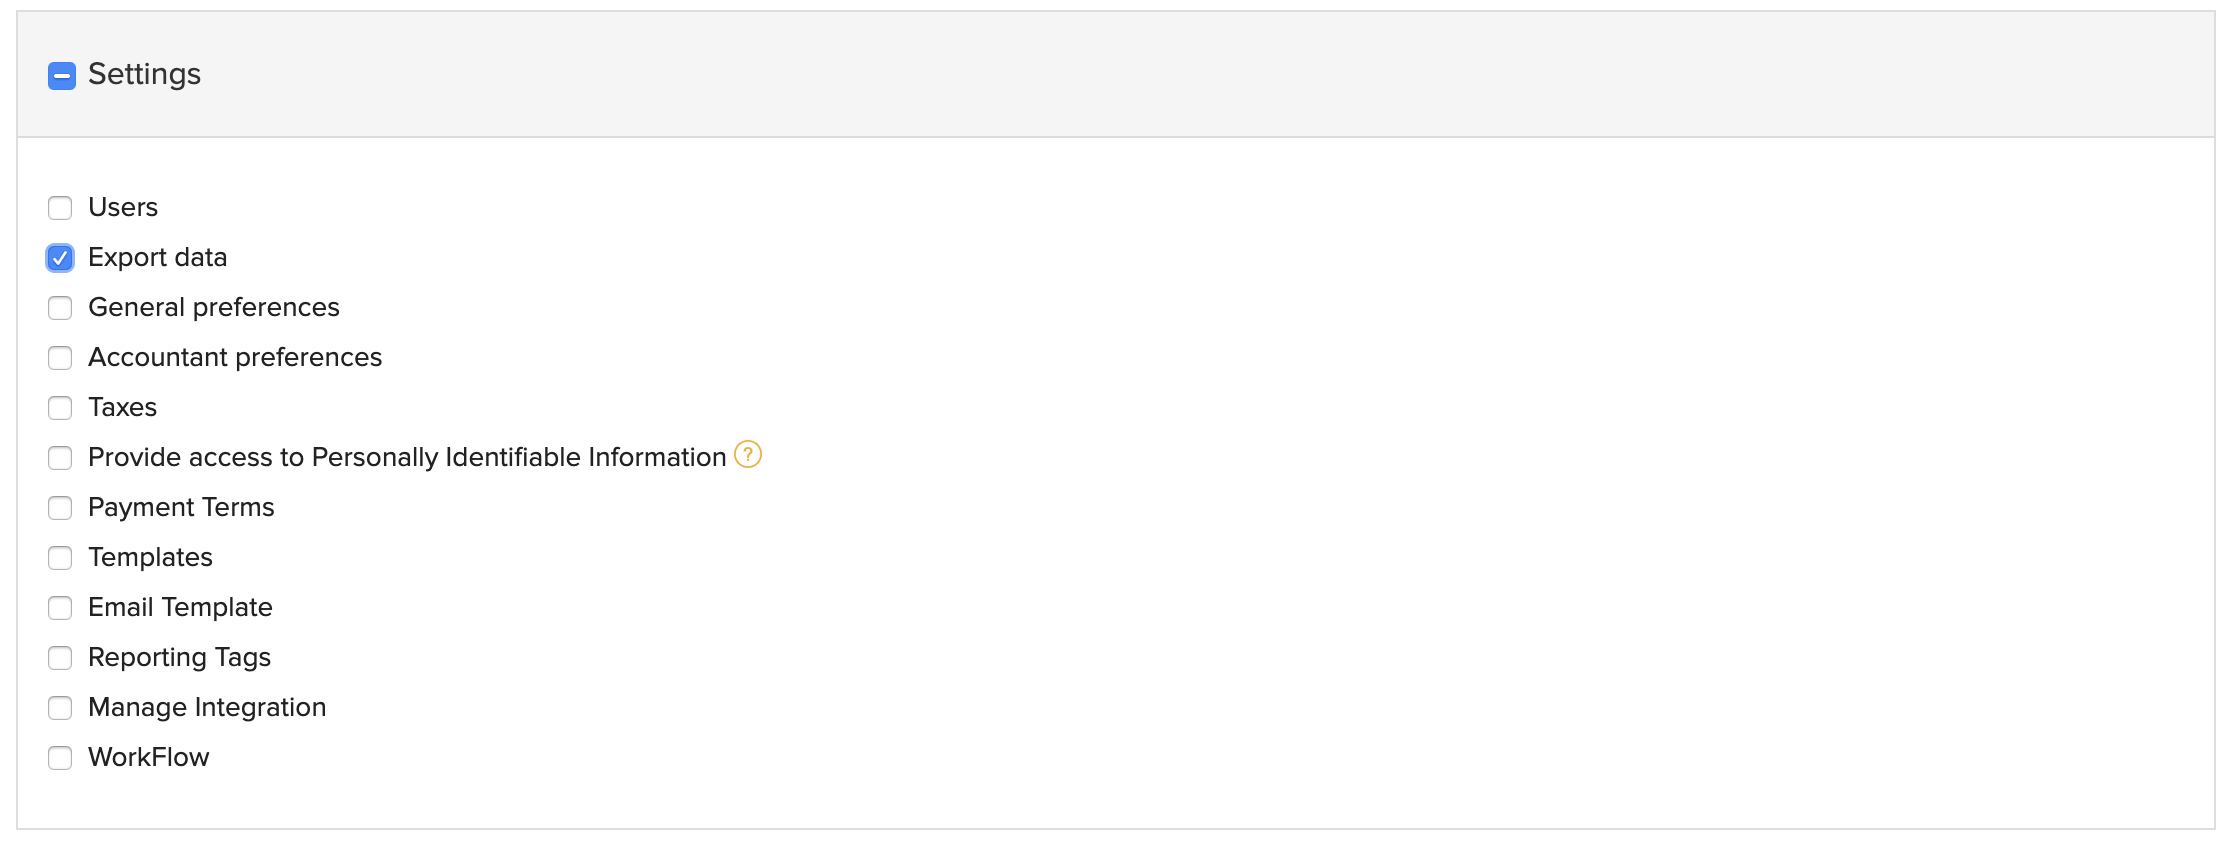
- Under Settings, leave only Export data checked.
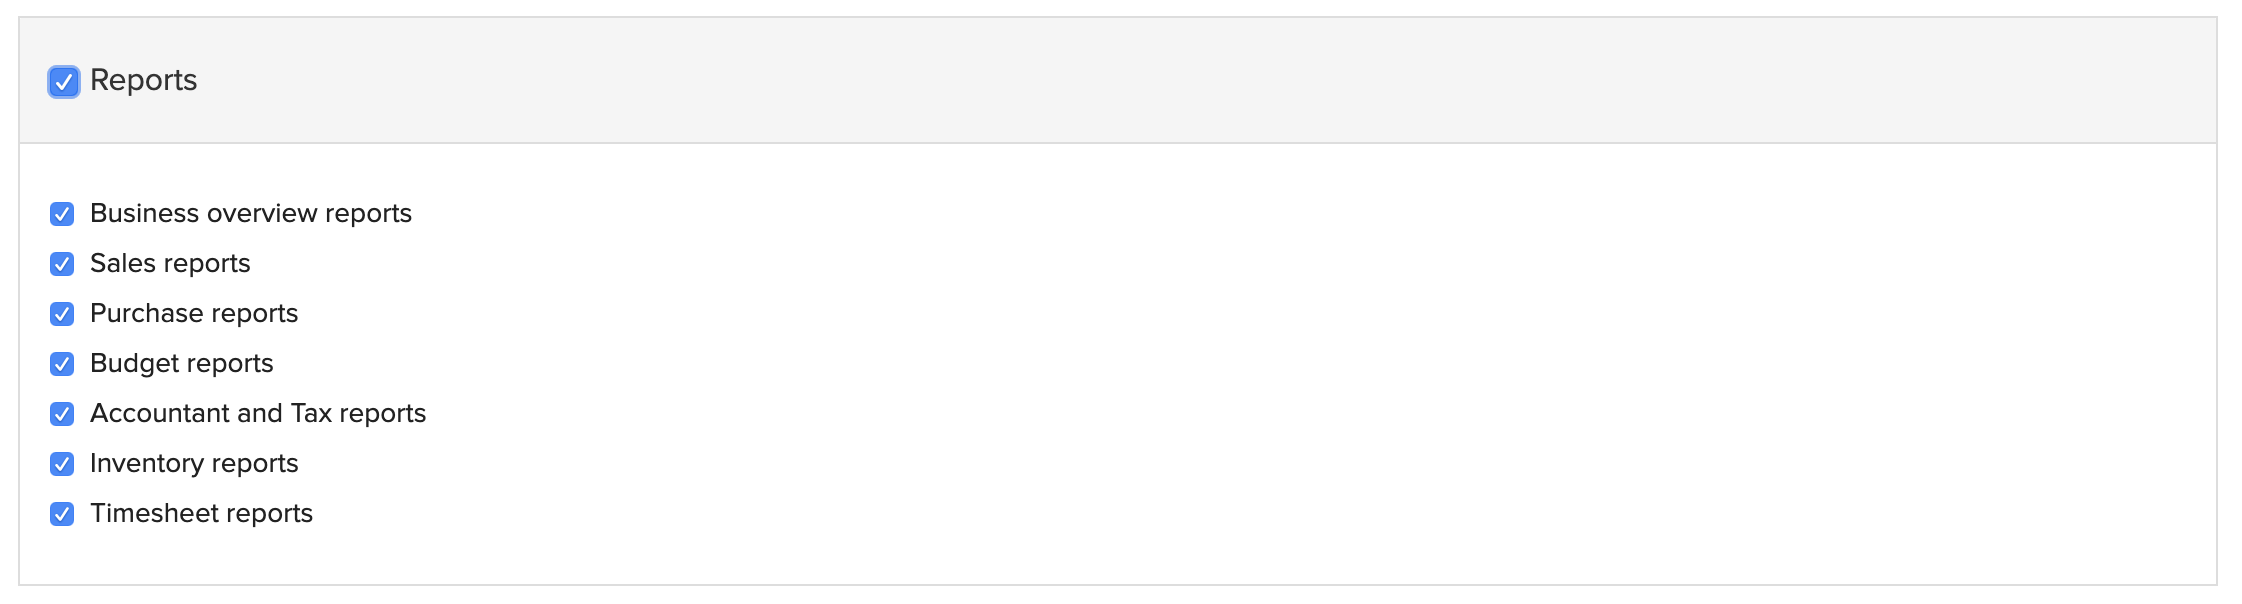
- Under Reports, check all boxes.
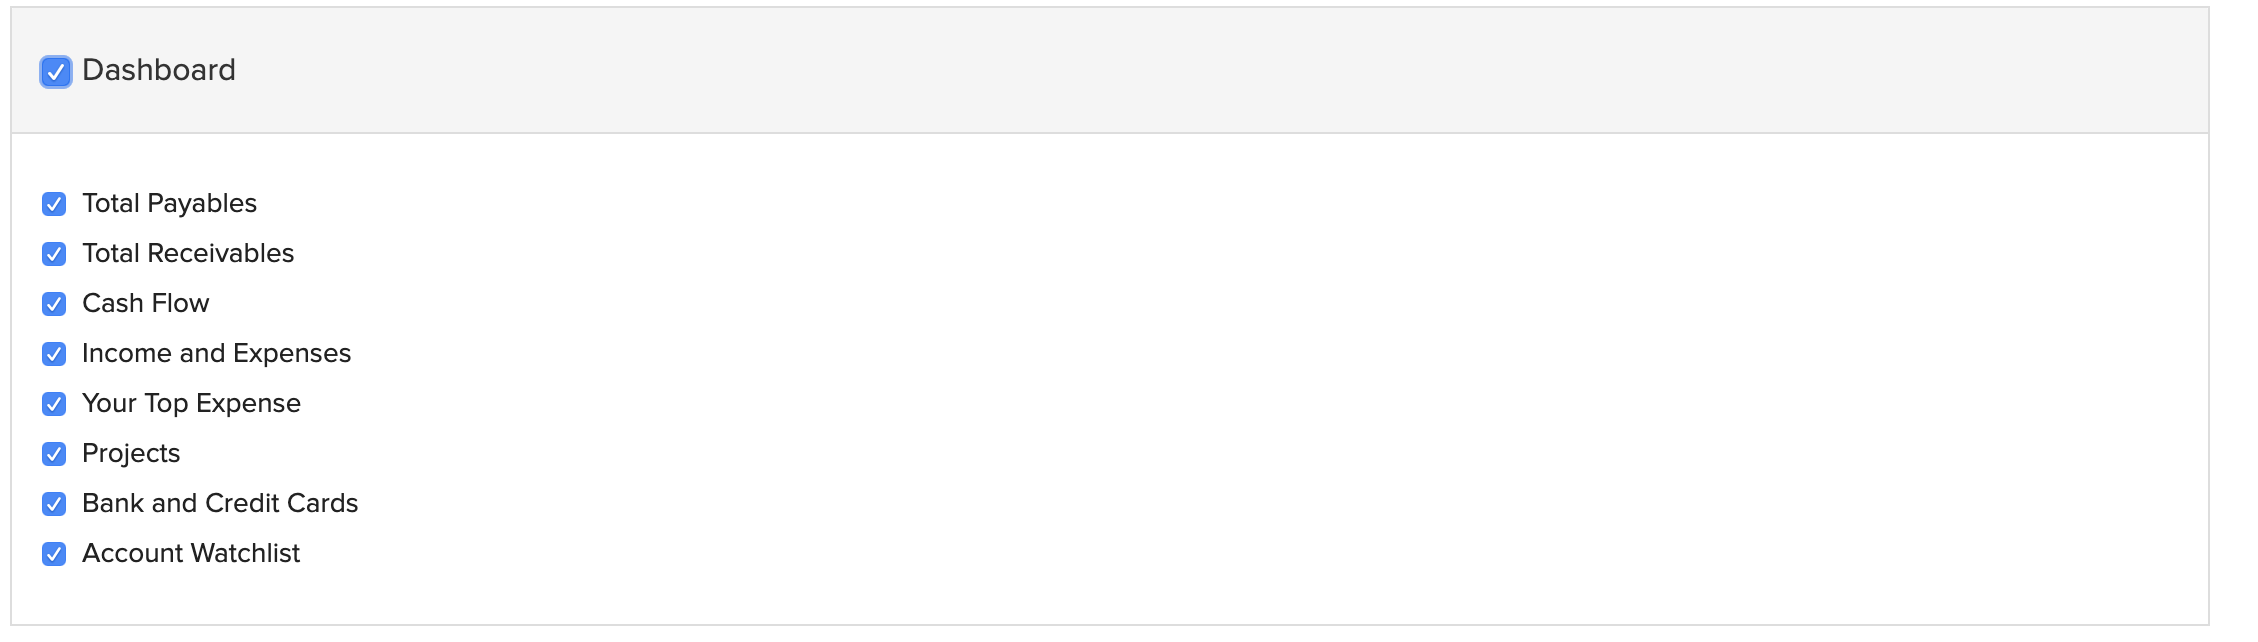
- Under Dashboard, check all boxes.
- Click Save.
You will return to the Roles page. You should see View Only as one of the roles listed.

Step 3: Invite Jenfi as a New User
- Click the All Users tab at the top of the page.
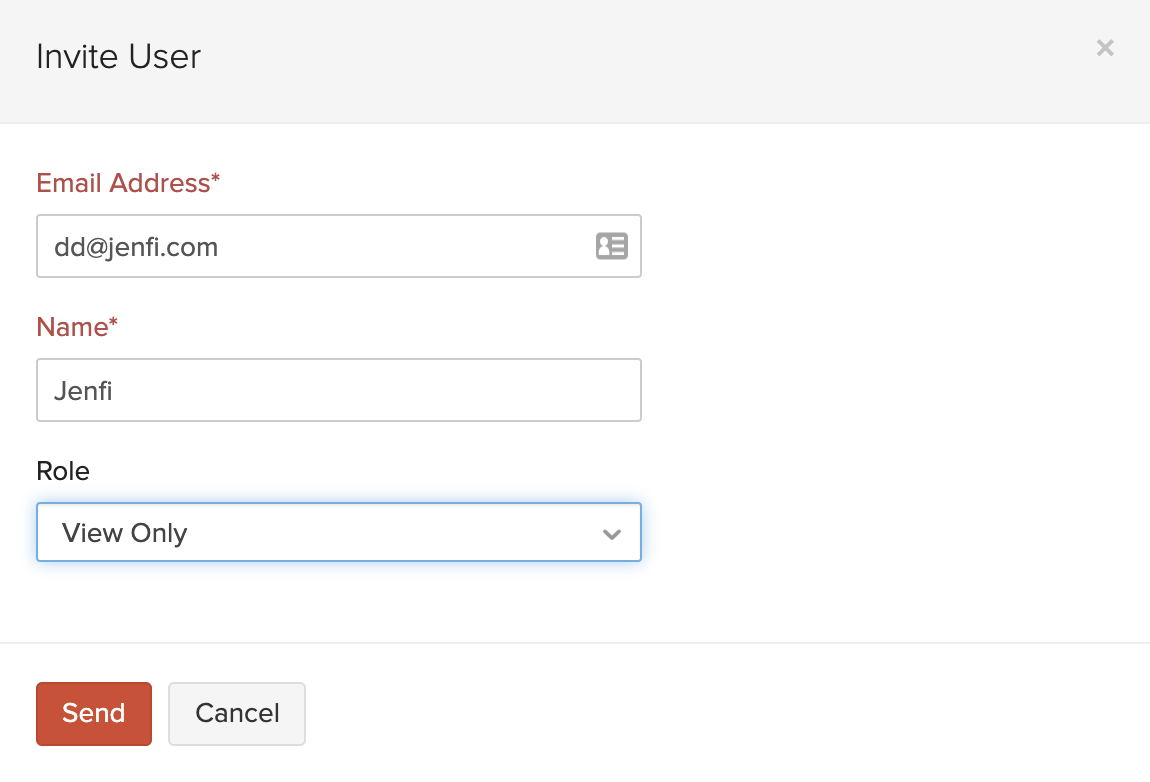
- Click the red New User button in the top right corner of the page.
- dd@jenfi.com
Type this into the Email Address field. - Jenfi
Type this into Name field. - Click on dropdown menu under Role, select View Only.
- Click the red Send button.
Jenfi will receive read-only access of your Zoho Books Online Account upon accepting the invitation email.
Refer to the Zoho Books Help Docs if you need further assistance with your account.